
Discover what you can do to reduce your chance of injury when hiking in the Alps.
When I completed the Tour du Mont Blanc in 2021, there was something I found very surprising. It wasn’t the incredible landscapes, ease of navigation, food, and alpine culture. That is well-known and certainly lives up to the hype. What surprised me was the number of people suffering from injuries along the trail.
What was still even more surprising than the sheer volume of injuries was the profile of the people who were sustaining these injuries. In general, the older trekkers tended to fare better than the younger ones. Perhaps this was because the older folks have often completed more trekking or walking trips, know the demands AND prepare well. Whereas younger people relied on their youthful spirit and general fitness to get them through.
My experience on the Tour du Mont Blanc confirmed to me that there are a huge number of preventable injuries that impact bucket list hiking trips each year. It doesn’t need to be this way, and I can show you how!
Hi, I’m Stacey 👋. I'm a hiker, Doctor of Physical Therapy, and athletic trainer that grew up with the Pacific Crest Trail in my backyard. In this blog, I’m going to break down the factors that cause injuries on the trail and introduce a few simple exercises that can address one of them to start preparing your body for the Alps.
What causes hiking injuries?
Injury risk factors can be divided into two categories;
1) Intrinsic factors; and
2) Extrinsic factors.
Intrinsic factors are internal, personal factors that are specific to YOU. Extrinsic factors are those factors external to you. Both groups can be further broken down into modifiable and non-modifiable factors- things that we can change and things that we cannot change.
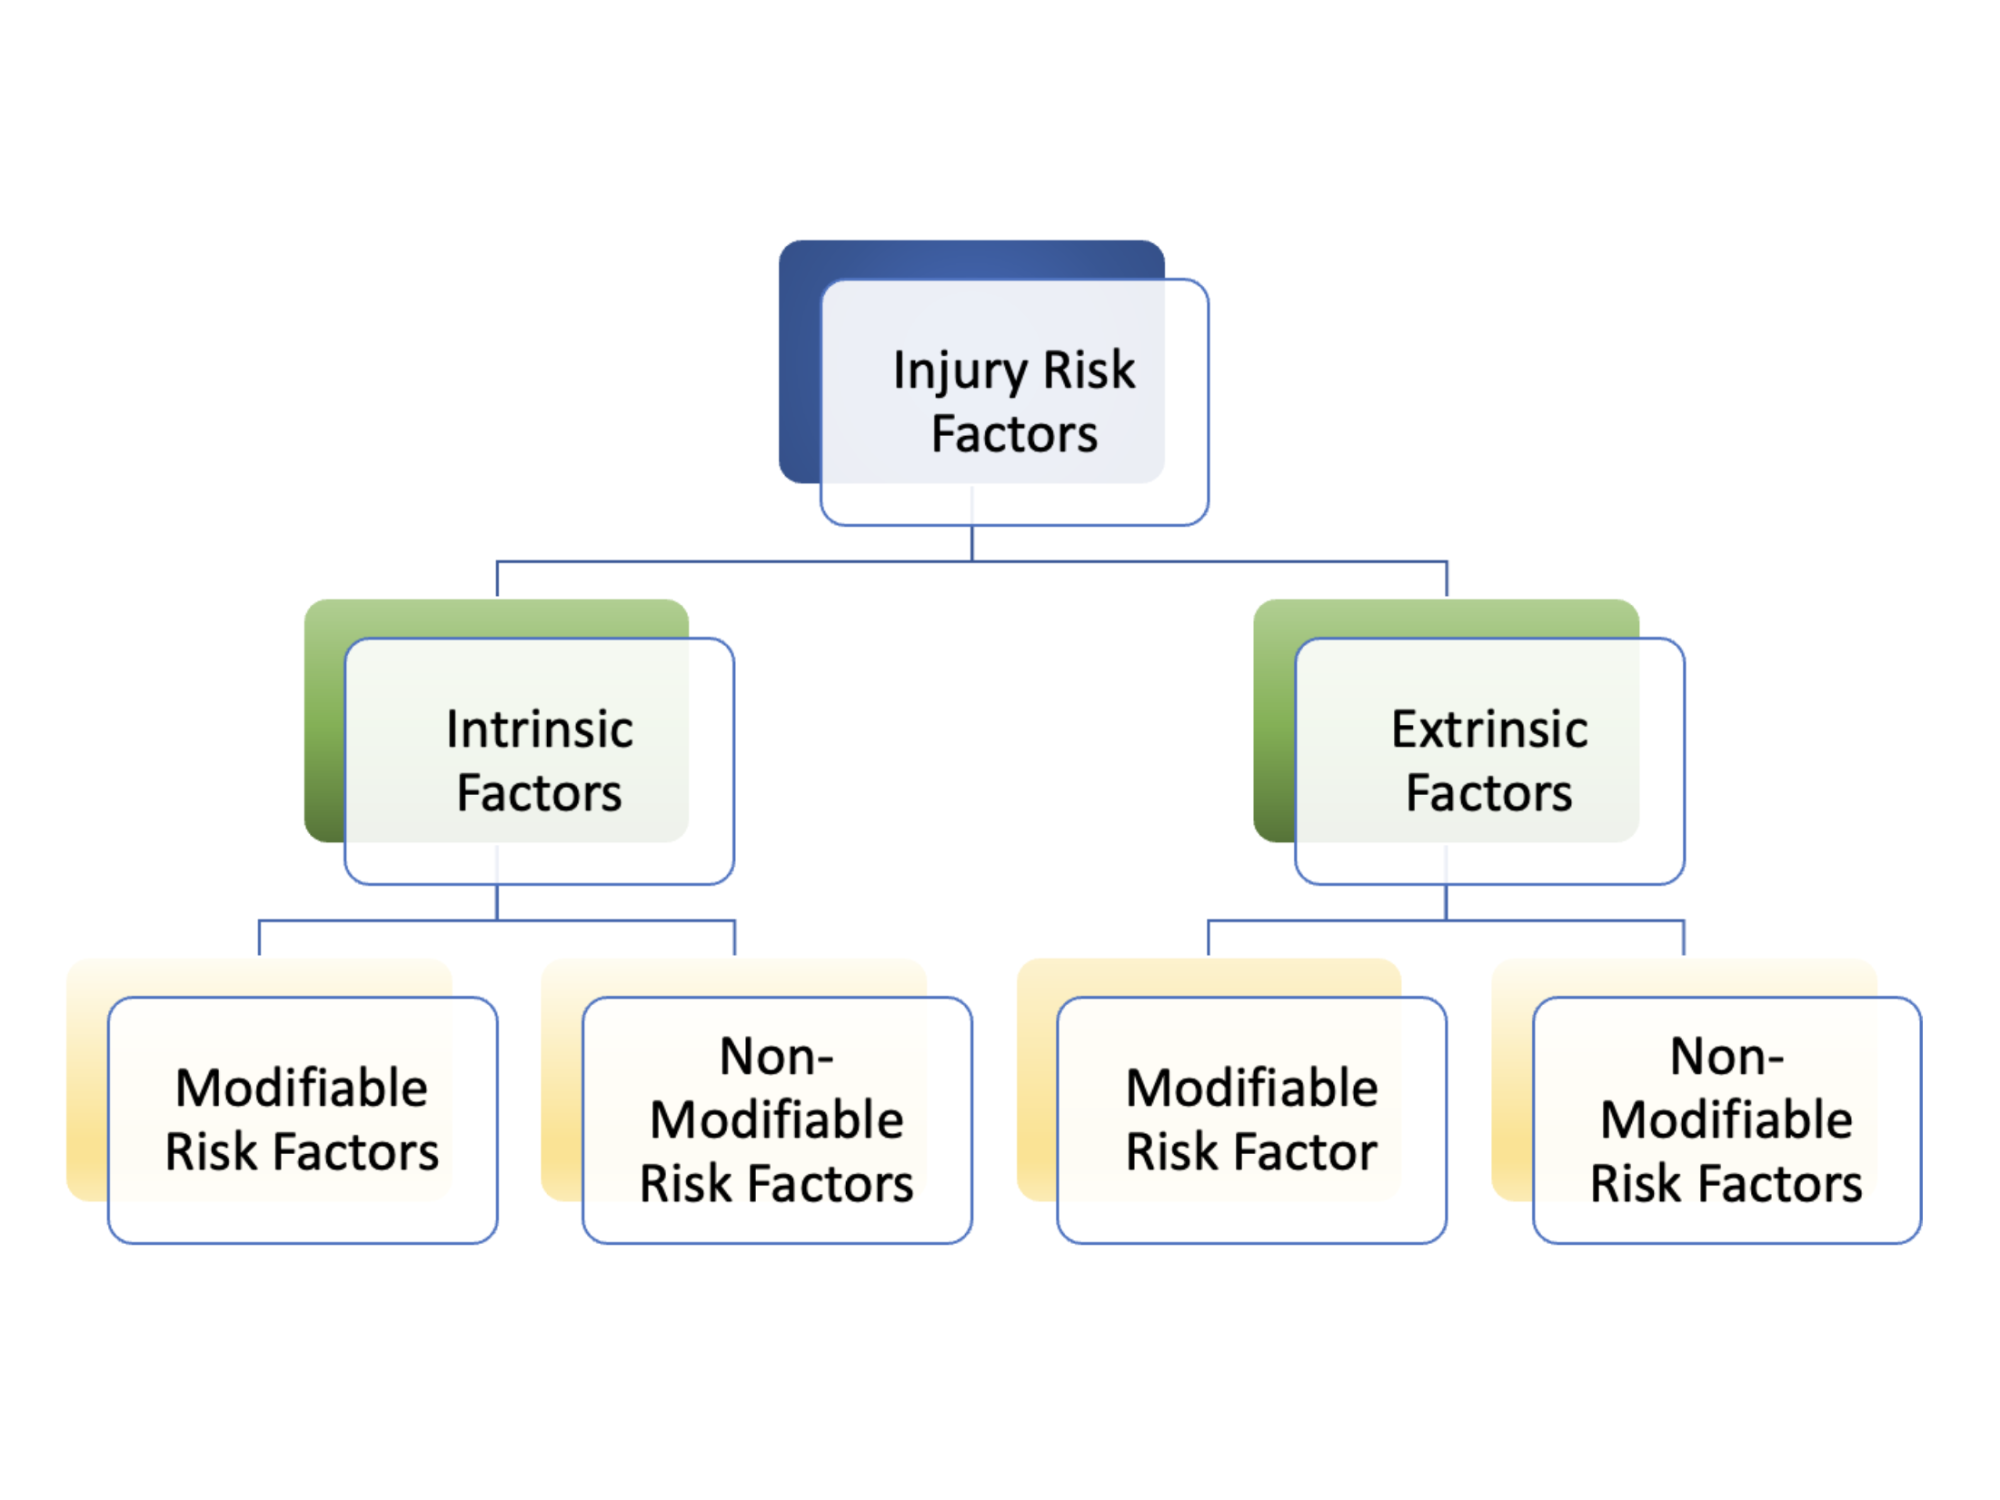
Injury risk factors: A helpful diagram illustrating the different categories
To apply this model to hiking, I’ve created the following table to highlight some examples of injury risk factors that fall into each category.

Injury risk factors: A table with hiking examples in each quadrant
The quadrant I focus on with my experience and expertise is the bottom left - Modifiable Intrinsic Factors. I will dive into flexibility as an example to show you how some work you do in the lead-up to your hike can better prepare your body for the trail.
Improving your flexibility for the Alps
If you pay attention to health and fitness media, chances are you’ve seen stretching, especially static stretching, getting a lot of negative press over the last several years. Just like most things in life, there is a time, place, and optimal situation for stretching. Rarely are things 100% bad or good, 100% of the time. Static stretching as part of a full preparation program has been proven to improve muscle flexibility and joint motion. Flexibility (muscles) and mobility (joints) are only one piece of the puzzle, though. You must be able to first control your movement and then display strength through your full available range of motion in order to improve performance and decrease injury risk.
With seemingly endless options and variations of stretches, it's hard to know what to integrate, why and when. Below are 5 key stretches to target the most used hiking muscles. These stretches are safe, simple, and effective. Performance instructions are listed along with a picture of how to complete each stretch.
Many people also ask about timing of stretches: pre- or post-hiking. Honestly, the science isn't overwhelmingly compelling to support one vs. the other, so do whatever feels best to you! For some people this routine is an effective way to begin a warm-up to prepare your body for activity. For others, it is a great way to wind down and part of ending a wonderful day. I prefer it as part of my evening routine opting for something more active in the morning.
As it interests you, pay special attention to the anatomy and the explanation of why there are subtle variations that can make a BIG difference. Wherever you are reading this - give these a try;
Straight Knee Calf Stretch (Gastroc)

Instruction
Back leg is being stretched.
Feet staggered.
Lean forward.
Straighten the back leg as much as possible.
You should feel the stretch in the back of the lower leg.
Hold 30". Switch legs. Repeat 3 times each side.
2. Bent Knee Calf Stretch (Soleus)

Instruction
Back leg is being stretched.
Feet staggered.
Lean forward.
Bend the back leg at the knee.
You should feel the stretch in the back of the lower leg, further down towards the Achilles and ankle compared to the straight knee stretch.
Hold 30". Switch legs. Repeat 3 times each side.
Advice: Why include both? The calf complex is made of two different muscle groups, your gastrocnemius and your soleus. Your gastroc crosses the back of your knee. Your soleus does not.

If you are only stretching with a straight knee you are missing the opportunity to selectively stretch your soleus, one of the key muscles used in hiking, walking and running!
3. Standing Quad Stretch

Instruction
Start with feet next to each other.
Standing next to a wall for balance if needed (challenge yourself to stand without the wall too!)
Bend your knee to bring your heel up towards your body.
You should feel the stretch in the front of the upper leg*.
Hold 30". Switch legs. Repeat 3 times each side.
Advice (*): You should NOT feel anything in your low back. If you do, don't pull quite as hard. Make sure you don't have a big arch in your lower back. If you pull really really hard or the muscle is tight, the pelvis can rotate forward, adding compression to the spine in the back causing low back pain. You can also try gently squeezing your butt together like you have a walnut between your butt cheeks. This will rotate your pelvis back and should relieve the pressure on your back.
4. Kneeling Hip Flexor Stretch

Instruction
Start half kneeling on the floor.
The leg under your body is being stretched.
Gently squeeze your glutes together to rotate your pelvis backwards ("tuck your tail").
You should feel the stretch in the front of the hip or leg that is down under your body.
Hold 30". Switch legs. Repeat 3 times each side
Advice: You may know of the lunging variation of this stretch (lunging forward from the pictured position above). If you lunge forward vs rotate/tuck the pelvis the amount of sheer force or forward pulling directly on the spine increases. If you have experienced low back pain, starting with the tuck version as described above will be more spine-friendly. It may be counter-intuitive but stretching the FRONT of the hip can actually relieve pain and tension in your BACK.
5. Static Hamstring Stretch

Instruction
Lay down flat on the floor.
The leg in the air is being stretched.
Use a stretching strap, scarf, towel, dog leash etc. to hold your leg as straight in the sky as possible. Keep the knee straight without being locked out.
You should feel the stretch in the back of the leg that is up.
Hold 30". Switch legs. Repeat 3 times each side
Advice: If you feel pressure in your low back or want an alternative, bend your other leg so your foot is flat on the floor. This will help flatten out and relax the arch in your low back.
You can think of the hamstrings as the "opposite" hip flexors. They attach to the back side of the pelvis and can rotate your pelvis backwards. Ensuring they are appropriately flexible is essential to avoid the "tug-of-war" between the hip flexors on the front of the pelvis and hamstrings on the back. Can you see how tightness of this muscle group could lead to challenges completing activities like taking a big step up an incline or up onto a rock?
What next?
Now, continue through the chart as you prepare for your next adventure! How does your fitness level stack up? Are you prepared to meet the demands on the trail incline? Do you know what muscles need to be trained and how to train them? What previous injuries have you had that need to be considered? Get in touch if you’d like to discuss how best to prepare for your bucket list hike, and stay tuned for more training tips coming soon.
Learn. Prepare. Do
-Stacey

Author: Stacey Hardin, USA
Stacey is a hiker, Doctor of Physical Therapy, and athletic trainer that grew up with the Pacific Crest Trail in her backyard. She has spent the last 10 years helping professional and elite athletes achieve their high-performance goals, while conquering her own hiking goals around the world. She is the Founder of Pique to Peak which creates simple but effective training and exercise plans that help decrease injury risk and prepare people for their bucket list hikes with confidence.